Building a Digital Scale using Arduino UNO and HX711
Tutorial plan
1- Objective of the project
2- Required Components
3- Circuit Connections of system
4- Arduino program of weight scale
Objective of the project
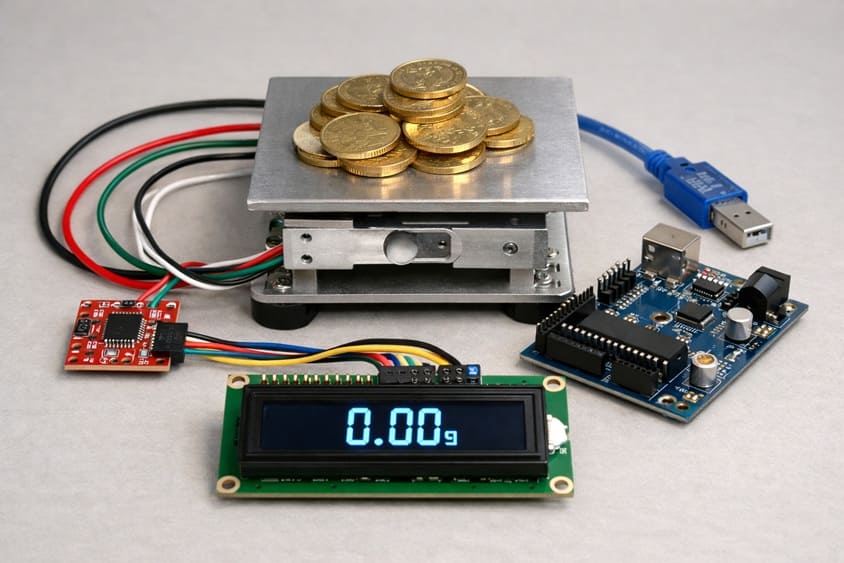
The objective of the project “Building a Digital Scale using Arduino and HX711 and LCD I2C Screen” is to design and implement a low-cost digital weighing system capable of measuring weight accurately and displaying the result in real time. This project allows learners to understand how force can be converted into electrical signals, how small analog signals can be amplified and digitized, and how microcontrollers process and display data. It is mainly intended for educational purposes to demonstrate sensor interfacing and embedded system design.
The functioning of the system begins with the load cell, which acts as the weight sensor. When an object is placed on the scale, the load cell slightly deforms. This deformation changes its internal electrical resistance, generating a very small analog voltage signal proportional to the applied weight. Since this signal is extremely weak, it cannot be read directly by the microcontroller.
To solve this, the HX711 module is used. It amplifies the tiny voltage signal produced by the load cell and converts it into a high-resolution digital value using its built-in 24-bit analog-to-digital converter. The digital data is then transmitted to the Arduino Uno, which processes the information.
The Arduino reads the data from the HX711, applies a calibration factor, and converts the raw measurement into a readable weight value expressed in grams or kilograms. Finally, the processed result is sent to the LCD I2C 16x2, which displays the measured weight clearly. The I2C communication protocol simplifies wiring by using only two data lines, making the system compact and easy to assemble.
Required Components
1. Arduino UNO

It reads digital data from the HX711 module, processes the values, applies calibration, and controls the LCD display. The ESP32 is powerful, fast, and suitable for real-time sensor applications.
2. Load cell sensor
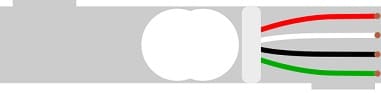
The load cell sensor is the component responsible for measuring weight. It works using strain gauges that change resistance when pressure or weight is applied. When an object is placed on the platform, the load cell slightly deforms and produces a very small analog voltage proportional to the weight.
3. HX711 amplifier module
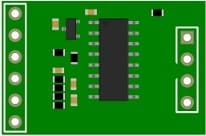
The HX711 module is a precision 24-bit analog-to-digital converter (ADC) specially designed for weight measurement systems. Since the signal generated by the load cell is extremely small (in millivolts), the HX711 amplifies this weak signal and converts it into digital data that the Arduino UNO can read accurately.
4. LCD Display with I2C Module

The LCD I2C display is used to show the measured weight. It receives data from the Arduino UNO and displays the weight value in real time.
5. Breadboard

A breadboard is used to assemble the circuit without soldering. It makes it easy to connect and modify the components during testing and development.
6. Jumper Wires

Jumper wires are used to connect the Arduino UNO, HX711 module, load cell, and LCD display together. They ensure proper electrical connections between all components.
Circuit Connections of system
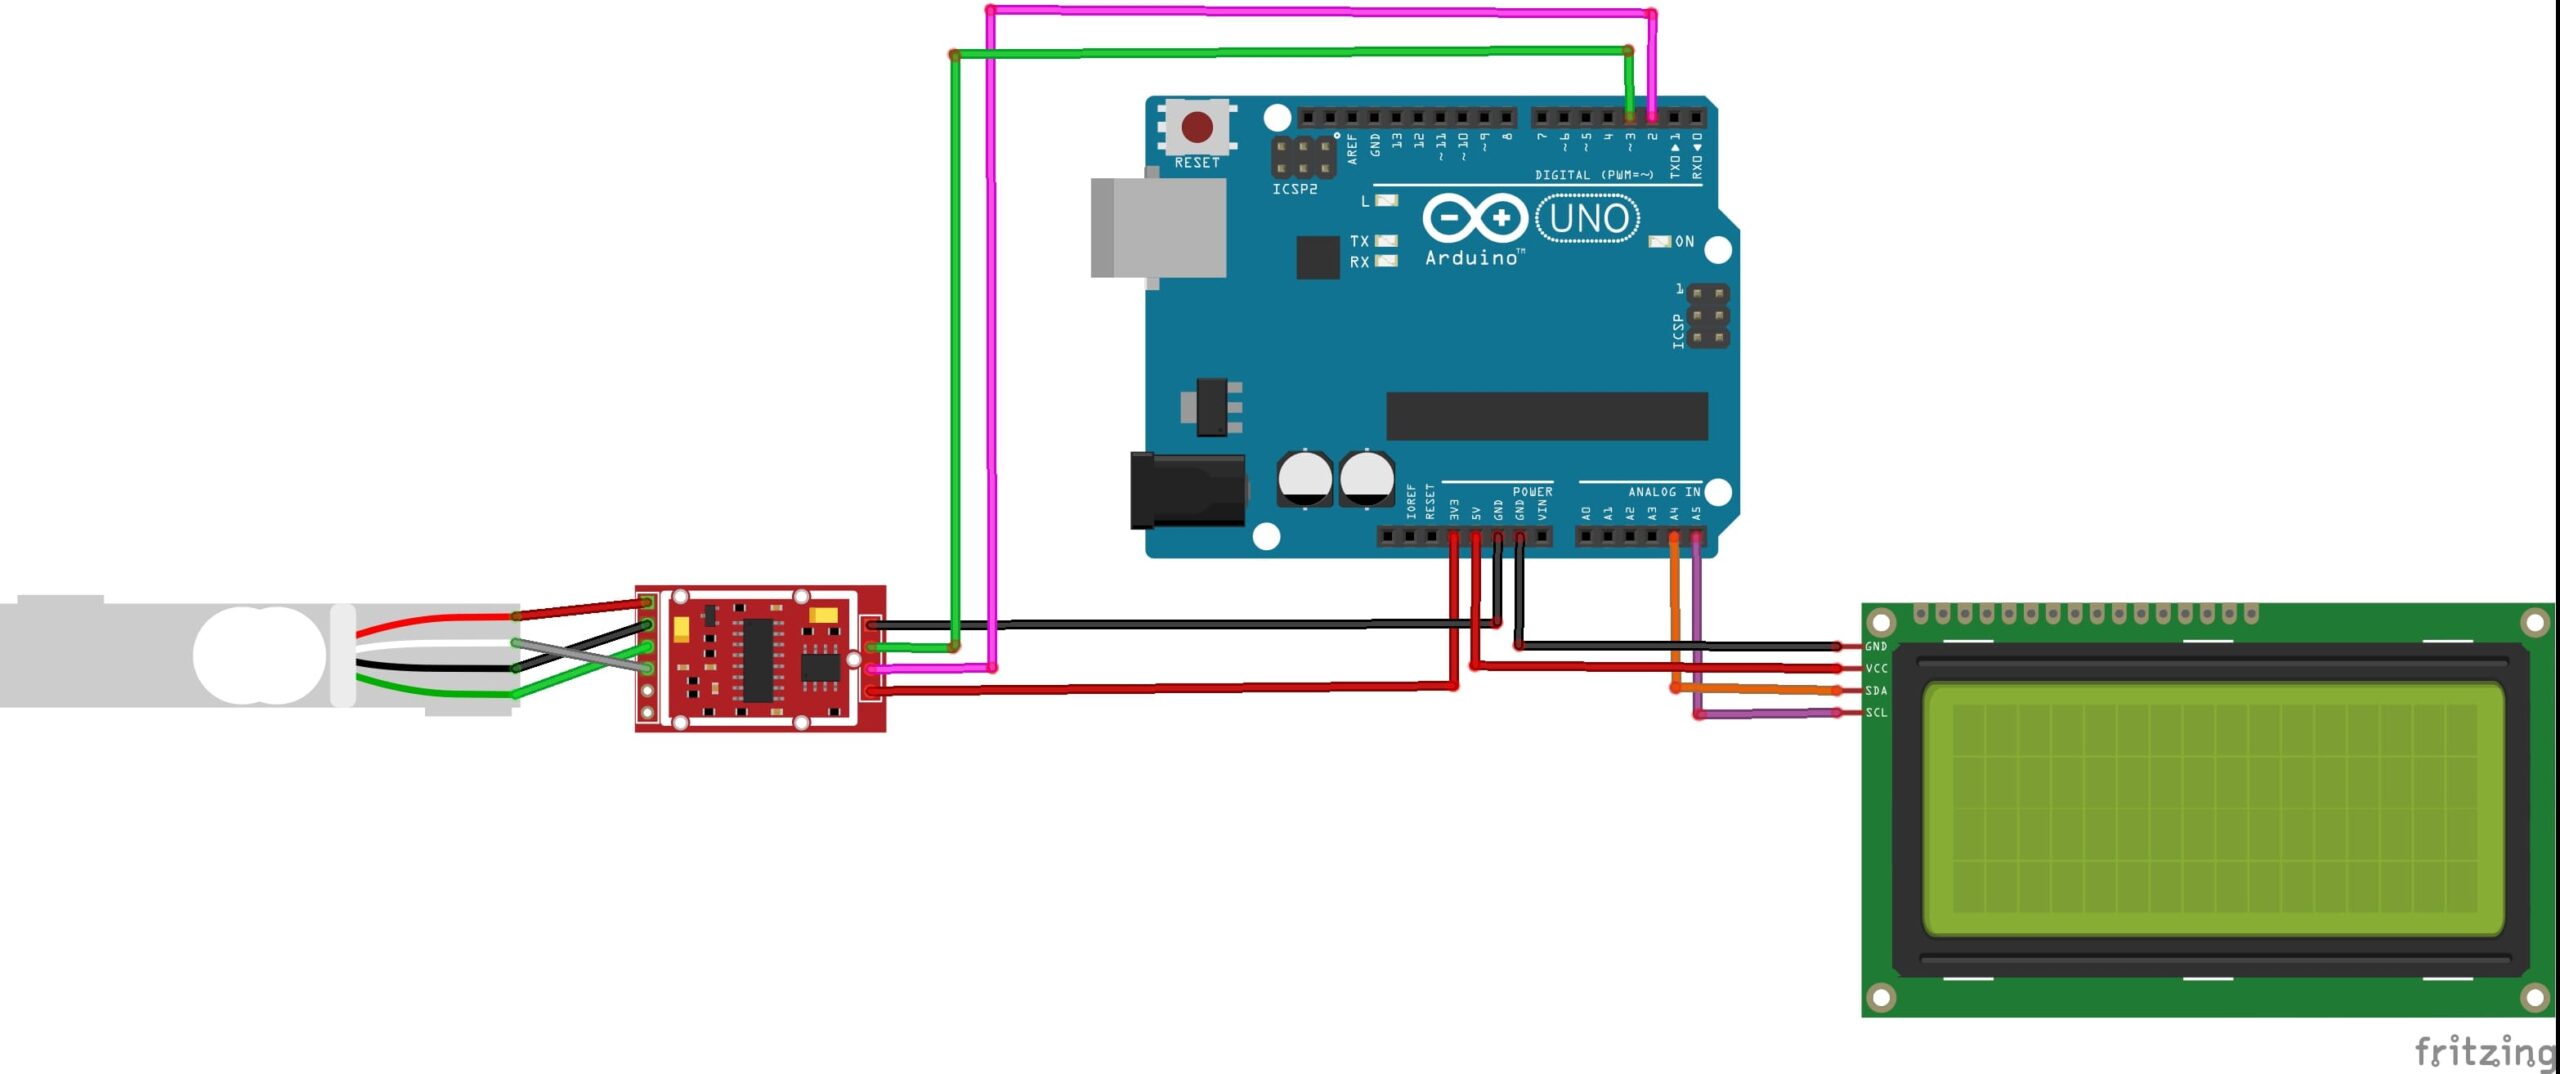
1- Connection of Load cell sensor to HX711 module
| Load cell sensor | HX711 module |
|---|---|
| Red | E+ |
| Black | E- |
| White | A- |
| Green | A+ |
2- Connection of HX711 module to Arduino UNO
| HX711 | Arduino UNO |
|---|---|
| VCC | 3V |
| GND | GND |
| DT | Pin 3 |
| SCK | Pin 4 |
3- Connection of LCD I2C display to Arduino UNO
| LCD I2C display | Arduino UNO |
|---|---|
| VCC | 5V |
| GND | GND |
| SDA | Pin A4 |
| SCL | Pin A5 |
Arduino program of weight scale
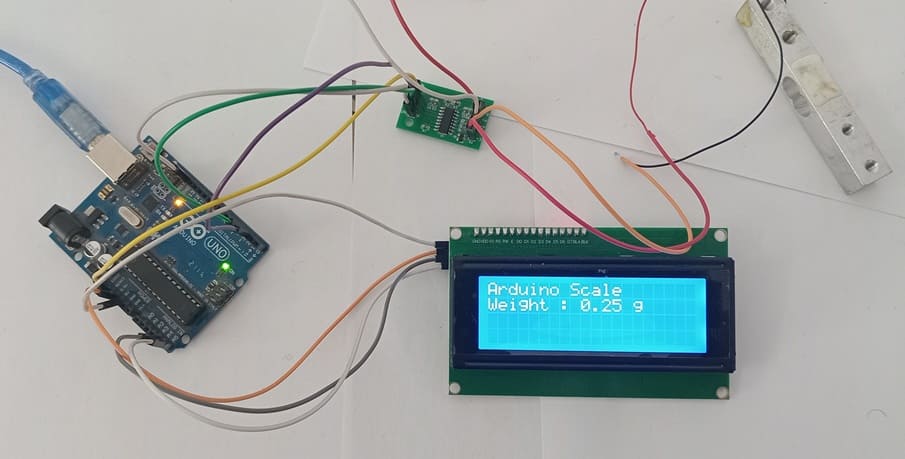
This Arduino program implements a digital weight scale system using an Arduino UNO, an HX711 load cell amplifier, and an LCD I2C display. The program reads weight data from a load cell sensor, processes it using calibration values, and displays the measured weight in grams on the LCD screen.
You need to install this libraries :
LiquidCrystal_I2C for I2C LCD screen
HX711-master for HX711 module
|
1 2 3 4 5 6 7 8 9 10 11 12 13 14 15 16 17 18 19 20 21 22 23 24 25 26 27 28 29 30 31 32 33 34 35 36 37 38 39 40 41 42 43 44 45 46 47 48 49 50 51 52 53 54 55 56 57 58 59 60 61 62 63 64 65 66 67 68 69 70 71 72 73 74 75 76 77 78 79 80 81 82 83 84 85 86 87 88 89 |
// =============================== // Weight Reading using HX711 // Display on LCD I2C // =============================== // Include the library for the HX711 module #include "HX711.h" // Include the library for the I2C LCD display #include <LiquidCrystal_I2C.h> // =============================== // HX711 Configuration // =============================== // Define the pins used to connect the HX711 to the Arduino #define DT 3 // HX711 DT (Data) pin connected to Arduino pin 3 #define SCK 2 // HX711 SCK (Clock) pin connected to Arduino pin 2 // Create an object named "scale" to control the HX711 HX711 scale; // =============================== // LCD I2C Configuration // =============================== // Create the LCD object // 0x27 = I2C address of the LCD // 20 = number of columns // 4 = number of rows LiquidCrystal_I2C lcd(0x27, 20, 4); // =============================== // Calibration Factor // =============================== // Calibration factor used to convert raw data into grams // This value must be adjusted according to your load cell float calibration_factor = 235; void setup() { // Initialize serial communication (for Serial Monitor output) Serial.begin(9600); // =============================== // LCD Initialization // =============================== lcd.init(); // Initialize the LCD screen lcd.backlight(); // Turn on the LCD backlight lcd.setCursor(0, 0); // Set cursor to column 0, row 0 lcd.print("Arduino Scale"); // Display startup message // =============================== // HX711 Initialization // =============================== scale.begin(DT, SCK); // Start HX711 with defined pins scale.set_scale(calibration_factor); // Apply calibration factor scale.tare(); // Reset the scale to zero (no load) delay(2000); // Wait 2 seconds before starting measurements // lcd.clear(); // Clear the screen (optional) } void loop() { // Read the weight by averaging 10 measurements float weight = scale.get_units(10); // Set cursor to the second line lcd.setCursor(0, 1); lcd.print("Weight : "); // Display fixed label // Set cursor after the label text lcd.setCursor(9, 1); // Display weight with 2 decimal places lcd.print(weight, 2); lcd.print(" g "); // Add spaces to clear previous digits // Also display weight in the Serial Monitor Serial.print("Weight: "); Serial.print(weight, 2); Serial.println(" g"); // Small delay before next reading delay(500); } |
0 comment
Leave a comment
Passion for robotics

Recent tutorials


Robotics workshop

Polpular tutorials


Making robots

Most commented tutorials


Robotic arm

Categories
Smart Home