Command Micro:bit Maqueen robot using remote control
Tutorial plan
1- What is a Micro:bit Maqueen robot ?
2- How Command Micro:bit Maqueen robot using remote control ?
3- Programming the Maqueen Robot
What is a Micro:bit Maqueen robot ?
The Micro:bit Maqueen robot is a compact, programmable robot designed to work with the BBC micro:bit microcontroller. It provides a fun and interactive way for beginners and students to explore robotics, programming, and electronics.
Applications
Line-following robots: Using its line-tracking sensors.
Obstacle avoidance: Using ultrasonic or infrared sensors.
Interactive projects: Combining lights, sounds, and movement.
Creative extensions: Adding arms, lights, or other accessories for specific tasks.
Programming the Maqueen
MakeCode:
Use drag-and-drop blocks to program the Maqueen.
Add the Maqueen extension in MakeCode for access to specific robot functions.
Python:
Program the robot using MicroPython for more advanced functionality.
Remote Control:
Pair the robot with another micro:bit for remote control or use a mobile app (if supported).
The Maqueen robot is widely used in schools, coding workshops, and home projects to introduce programming and robotics concepts in an accessible and engaging way. It’s perfect for both beginners and intermediate learners who want hands-on experience with robotics.
How Command Micro:bit Maqueen robot using remote control ?
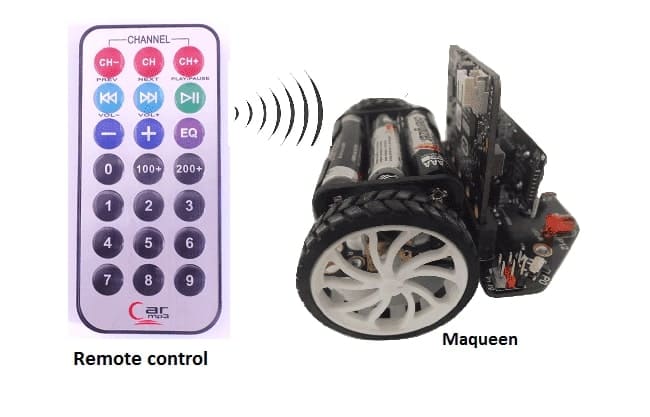
To control the Micro:bit Maqueen robot using infrared (IR), you can use an IR remote that comes with the Maqueen or a compatible IR remote control. The Maqueen robot is equipped with an IR receiver that detects signals from the remote.
Requirements
Maqueen Robot with an attached micro:bit.
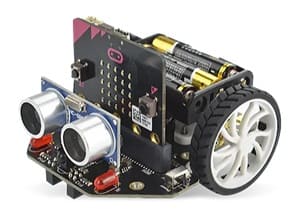
IR Remote: Usually included with the Maqueen robot.

The remote control sends specific IR codes when you press its buttons.
The Maqueen's IR receiver detects these codes.
Programming the Maqueen Robot
Use MakeCode to program the Maqueen to interpret the IR codes and respond accordingly.
1- Open MakeCode for micro:bit.
2- Add the necessary packages for the infrared sensor. Click on the "Advanced" category in the toolbox on the left, and then click on "Extensions". 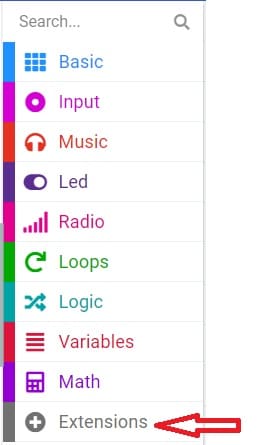
3- In the search bar, type "https://github.com/osoyoo/OSOYOO_IR_V3/" and click on the "OSYOO-IR-Silvery-Receiver" extension to import it into your project.

4- Initialize the KY-032 infrared sensor:

Insert a "on start" block from the "Basic" category to initialize the program when the Micro:bit board starts.
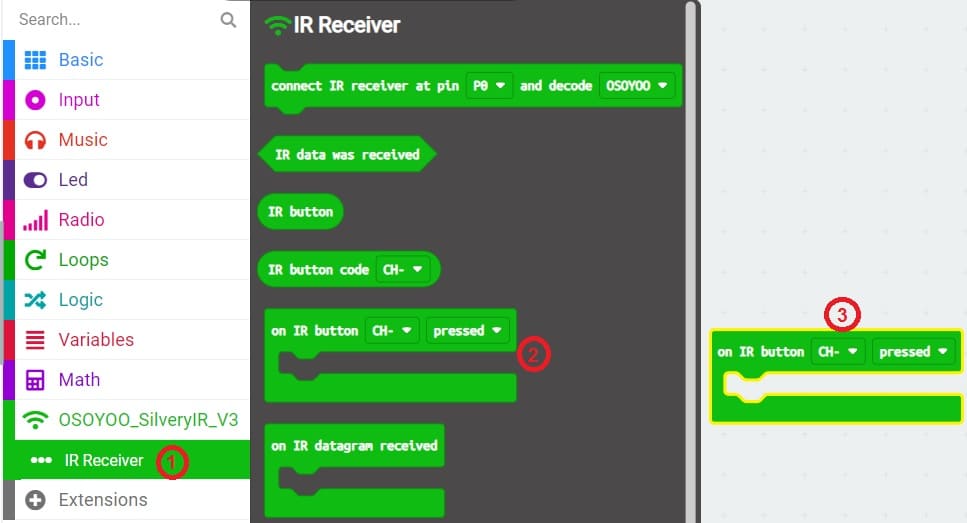
Insert the "connect IR receiver at pin P0 and decode OSOYOO" block from the "OSYOO_SilveryIR_V3" category to initialize the KY-032 sensor. Specify the pin to which the sensor is connected (for example, P0).
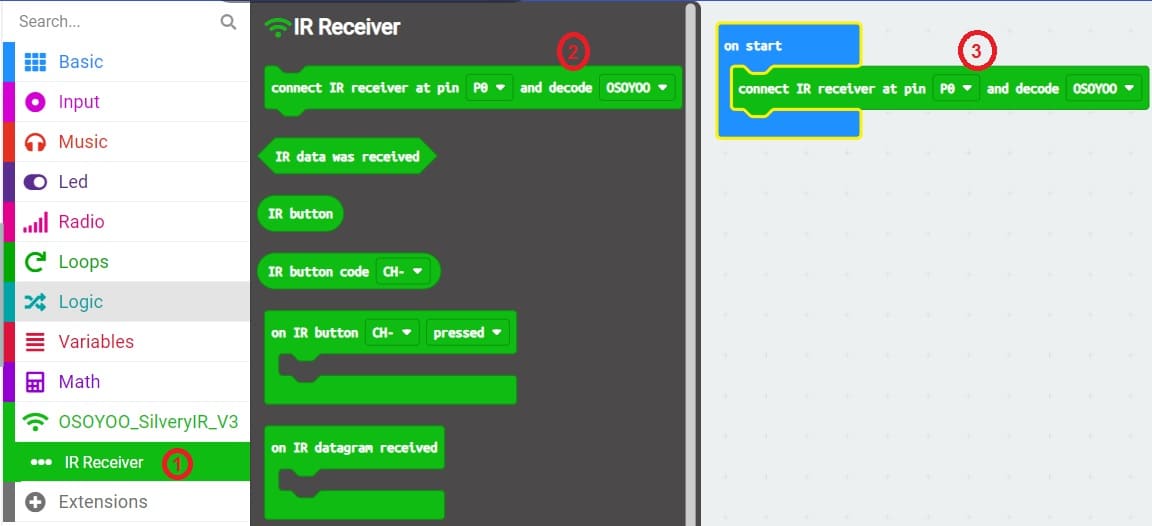
5- Add an event handler for receiving infrared signals :
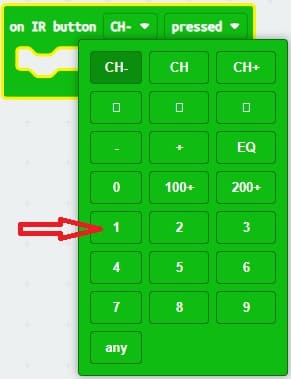
Insert an "on IR Button" block from the "OSYOO_SilveryIR_V3" category to trigger an action when the infrared signal is received and specify the button on the remote control.
