Control an RGB LED with Push Buttons and ESP8266 NodeMCU
Tutorial plan
1- Objective of the tutorial
2- The components needed to control RGB LED module with push buttons
3- Mounting ESP8266 NodeMCU card with RGB LED module and push buttons
4- Program ESP8266 NodeMCU with MicroPython
Objective of the tutorial
The main objective of this tutorial is to explain step by step how to control an RGB LED using multiple push buttons connected to the ESP8266 NodeMCU board.
This project helps learners understand how to use digital inputs and outputs to interact with external components such as LEDs and buttons.
By following this tutorial, you will learn how to:
- understand the working principle of an RGB LED, including the difference between common anode and common cathode types.
- connect the RGB LED and push buttons properly to the ESP8266 NodeMCU using a breadboard and jumper wires.
- write and upload a MicroPython program to the ESP8266 NodeMCU to control the RGB LED according to the button pressed.
- use the digital input pins of the ESP8266 to detect the state of each push button.
- use the PWM (Pulse Width Modulation) outputs to adjust or mix colors of the RGB LED.
- combine different buttons to create new colors by mixing red, green, and blue light.
- develop a better understanding of basic electronics, MicroPython programming, and interactive control systems using the ESP8266 NodeMCU.
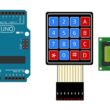
The components needed to control RGB LED module with push buttons
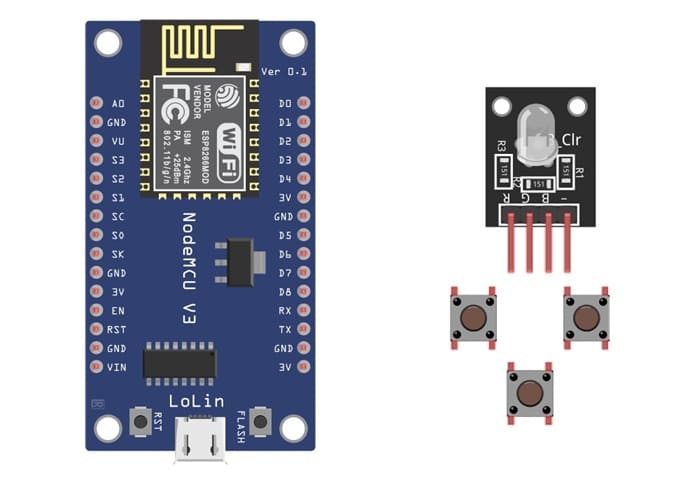
1- ESP8266 NodeMCU Board
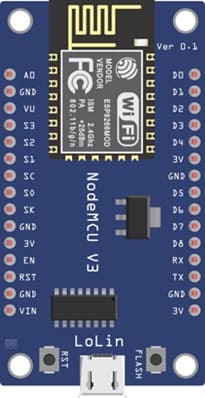
The microcontroller to read button inputs and control the RGB LED.
2- RGB LED Module
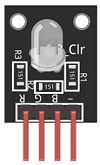
A module containing a common anode or cathode RGB LED with built-in resistors (simplifies wiring).
3- Push Buttons
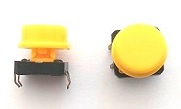
They are used for selecting or activating each color of the RGB LED (Red, Green, Blue).
4- Breadboard
They are used to easy connections and prototyping.
5- Jumper Wires

They are used to connect the push buttons and RGB LED module to the ESP8266 NodeMCU.
Mounting ESP8266 NodeMCU card with RGB LED module and push buttons
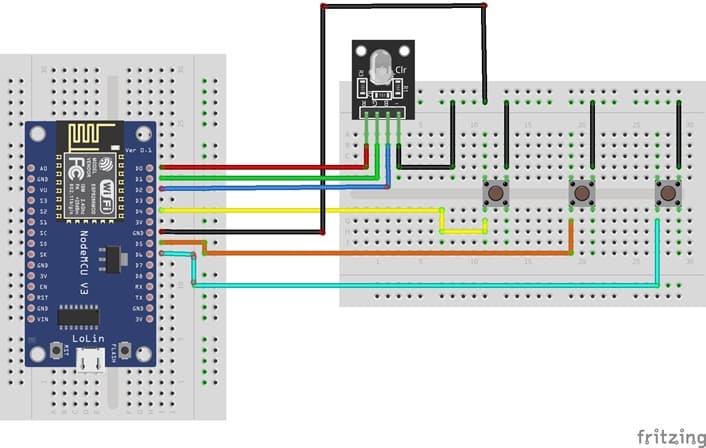
Once you have the necessary components, you can proceed with the following steps to control the RGB LED module:
1- Connect pin R (red) of RGB LED module to D0 (GPIO16) of the ESP8266 board
2- Connect pin G (green) of RGB LED module to D1 (GPIO5) of the ESP8266 board
3- Connect pin B (blue) of RGB LED module to pin D2 (GPIO4) of the ESP8266 board
4- Connect pin GND of RGB LED module to pin GND of the ESP826 board
For push buttons
1- Push button 1:
- Connect one leg of the push button to D3 (GPIO0) of the ESP8266 board.
- Connect another leg of the push button to the GND pin of the ESP8266 board.
2- Push button 2:
- Connect one leg of the push button to D4 (GPIO2) of the ESP8266 board.
- Connect another leg of the push button to the GND pin of the ESP8266 board.
3- Push button 3:
- Connect one leg of the push button to D5 (GPIO 14) of the ESP8266 board.
- Connect another leg of the push button to the GND pin of the ESP8266 board.
Program ESP8266 NodeMCU with MicroPython
To program the ESP8266 board with MicroPython to control RGB LED module using push buttons, write the MicroPython code
Here's a simple example of code to get you started :
1- Import the necessary modules:
|
1 2 |
import machine from machine import Pin import time |
2- Configure the pins (GPIO) for the push buttons and the three pins of RGB LED:
|
1 2 3 4 5 6 7 8 |
red_led=Pin(16, Pin.OUT) red_button = machine.Pin(0, machine.Pin.IN, machine.Pin.PULL_UP) green_led=Pin(5, Pin.OUT) green_button = machine.Pin(2, machine.Pin.IN, machine.Pin.PULL_UP) blue_led=Pin(4, Pin.OUT) blue_button = machine.Pin(14, machine.Pin.IN, machine.Pin.PULL_UP) |
3- Create a variable to keep the state of the RGB LED (0 if the color of RGB LED is off and 1 if the color of RGB LED is on)
|
1 2 3 |
red_state=0; green_state=0; blue_state=0; |
Create a loop to monitor the push buttons status and turn the three LEDs on/off accordingly:
|
1 2 3 4 5 6 7 8 9 10 11 12 13 14 15 16 17 18 19 20 21 22 23 24 25 26 27 28 29 30 31 32 33 34 35 36 37 38 39 40 41 42 43 44 45 46 |
while True: red_first = red_button.value() time.sleep(0.01) red_second = red_button.value() if red_first and not red_second: #Button pressed print('Button pressed!') if (red_state==0): red_led.value(1) # turn on the red color of RGB LED red_state=1 else: red_led.value(0) # turn off the red color of RGB LED red_state=0; time.sleep(0.5) elif not red_first and red_second: print('Button released!') #led_rouge.value(0) green_first = green_button.value() time.sleep(0.01) green_second = green_button.value() if green_first and not green_second: # Button pressed print('Button pressed!') if (green_state==0): green_led.value(1) # turn on the green color of RGB LED green_state=1 else: green_led.value(0) # turn on the green color of RGB LED green_state=0; time.sleep(0.5) elif not green_first and green_second: print('Button released!') blue_first = blue_button.value() time.sleep(0.01) blue_second = blue_button.value() if blue_first and not blue_second: # Button pressed print('Button pressed!') if (blue_state==0): blue_led.value(1) # turn on the blue color of RGB LED blue_state=1 else: blue_led.value(0) # turn off the blue color of RGB LED blue_state=0; time.sleep(0.5) elif not blue_first and blue_second: print('Button released!') |
Here is the complete program in Micropython:
|
1 2 3 4 5 6 7 8 9 10 11 12 13 14 15 16 17 18 19 20 21 22 23 24 25 26 27 28 29 30 31 32 33 34 35 36 37 38 39 40 41 42 43 44 45 46 47 48 49 50 51 52 53 54 55 56 57 58 59 60 61 |
import machine from machine import Pin import time red_led=Pin(16, Pin.OUT) red_button = machine.Pin(0, machine.Pin.IN, machine.Pin.PULL_UP) red_state=0; green_led=Pin(5, Pin.OUT) green_button = machine.Pin(2, machine.Pin.IN, machine.Pin.PULL_UP) green_state=0; blue_led=Pin(4, Pin.OUT) blue_button = machine.Pin(14, machine.Pin.IN, machine.Pin.PULL_UP) blue_state=0; while True: red_first = red_button.value() time.sleep(0.01) red_second = red_button.value() if red_first and not red_second: print('Button pressed!') if (red_state==0): red_led.value(1) red_state=1 else: red_led.value(0) red_state=0; time.sleep(0.5) elif not red_first and red_second: print('Button released!') #led_rouge.value(0) green_first = green_button.value() time.sleep(0.01) green_second = green_button.value() if green_first and not green_second: print('Button pressed!') if (green_state==0): green_led.value(1) green_state=1 else: green_led.value(0) green_state=0; time.sleep(0.5) elif not green_first and green_second: print('Button released!') blue_first = blue_button.value() time.sleep(0.01) blue_second = blue_button.value() if blue_first and not blue_second: print('Button pressed!') if (blue_state==0): blue_led.value(1) blue_state=1 else: blue_led.value(0) blue_state=0; time.sleep(0.5) elif not blue_first and blue_second: print('Button released!') |
When the button is pressed (the state is low), the LED lights up. If the button is pressed another time, the LED turns off. The 0.5 second delay is used to prevent pushbutton bounce, which can cause multiple button activations with a single press.
This simple example demonstrates how to use MicroPython to control RGB LED module using push buttons with the ESP32 board.
0 comment
Leave a comment
Passion for robotics

Recent tutorials


Robotics workshop

Polpular tutorials


Making robots

Most commented tutorials


Robotic arm

Categories
Smart Home