Make your first shooting game in Scratch
Tutorial plan
1- Objective of the tutorial
2- Step-by-Step to create a shooting game
Objective of the tutorial
By the end of this tutorial, learners will be able to design and code a basic 2D shooting game in Scratch, where a player controls a character (or spaceship) that can shoot projectiles at moving enemies. This project helps learners practice essential Scratch programming concepts such as:
Using motion and control blocks
Handling keyboard inputs (e.g., arrow keys and spacebar)
Creating clones for bullets and enemies
Detecting collisions between sprites
Keeping and displaying score
Step-by-Step to create a shooting game
Step 1: Create the canon sprite
1) Go to the new sprites section and select the Paint icon.
![]()
2) Draw the cannon sprite using the drawing editor.
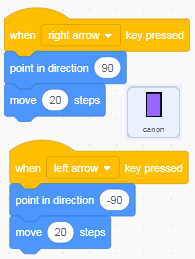
3) Move the cannon left and right
Insert these program blocks in the code area of the cannon sprite which allows the racket to be directed to the left or to the right using the two arrows (right and left) on the keyboard.
Step 2: Adding the ball sprite from the Scratch library:
The library gathers all the sprites created by Scratch.
1) Click on the Choose sprite icon.
![]()
2) Clicking the “Import Sprite” button should take you to the Sprite menu, a library of different sprites you can use in the program.
![]()
3) Click on the sprite ball and Scratch will create it as a new sprite in your game.
4) Adding the code to the sprite ball
First, we must create clones of the sprite ball thanks to this block
![]()
Here is the first part of the ball program which allows you to create copies of the sprite ball when you press hard on the space key on the keyboard.
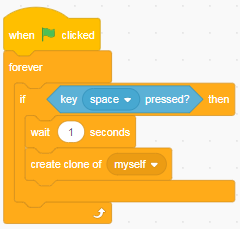
To fire the bullet from the cannon upwards:
We position the clones of the sprite ball on the cannel
![]()
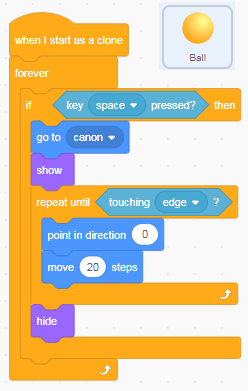
We display the clones of the sprite ball on the stage
![]()
We direct the clones of the sprite ball upwards to destroy the bricks.
![]()
We hide the clones of the sprite ball when they touch the edges of the scene
![]()
Here is the second program part of the Ball sprite which allows you to shoot the ball from the cannon towards the bricks.
Step 3: Creating the brick sprite:
1) Go to the new sprites section and select the Paint icon.
![]()
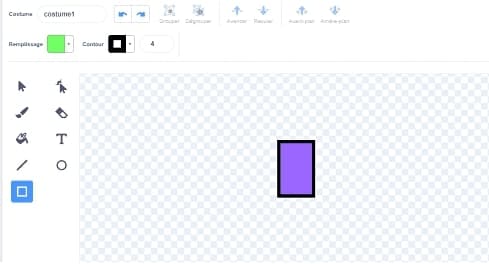
2) Draw the brick sprite using the drawing editor.

3) Get the bullet to destroy the brick
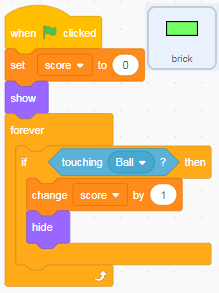
First we must create the variable score.
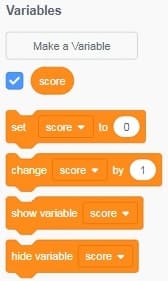
The set score to 0 block is executed when the green flag is clicked.
![]()
Then we insert the Show block from the Appearance category to display the brick at the start of the game.
![]()
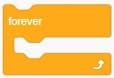
The code block allows its contents to be repeated indefinitely.
We insert the If Then block into the repeat forever loop.

To check if the ball hits a brick you must use the block hits the ball.
![]()
If the ball hits a brick, the score variable is incremented by 1
![]()
and the brick disappears from the scene using this block :
![]()
Here is the complete brick sprite program :
1 comment

digital marketing services 22-01-2626
constantly i used to read smaller content that as well clear their motive, and that is also happening with this article which I am reading here.
Leave a comment
Passion for robotics

Recent tutorials


Robotics workshop

Polpular tutorials


Making robots

Most commented tutorials


Robotic arm

Categories
Smart Home