Smartphone-controlled servo motor using Arduino UNO
Tutorial plan
1- Objective of the project
2- Required Components
3- Circuit Connections of system
4- Arduino program
5- The mobile app for controlling the servo motor
Objective of the project
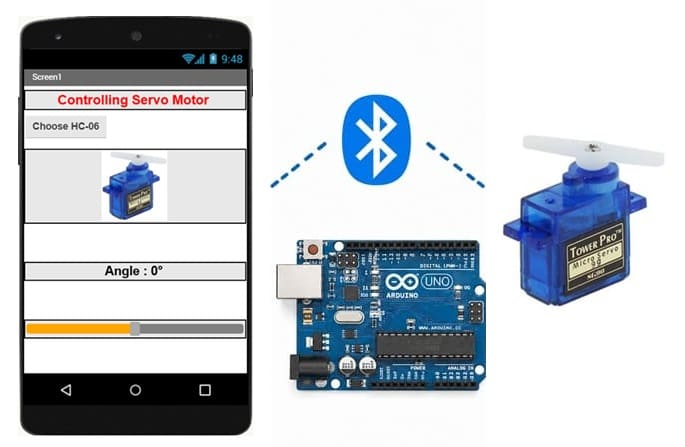
The objective of this project is to control the position of a servo motor wirelessly using a smartphone. The smartphone sends the desired angle via Bluetooth to the HC-06 Bluetooth module, which communicates with the Arduino UNO. The Arduino processes the received command and controls the servo motor so that it rotates to the requested angle.
How the System Works ?
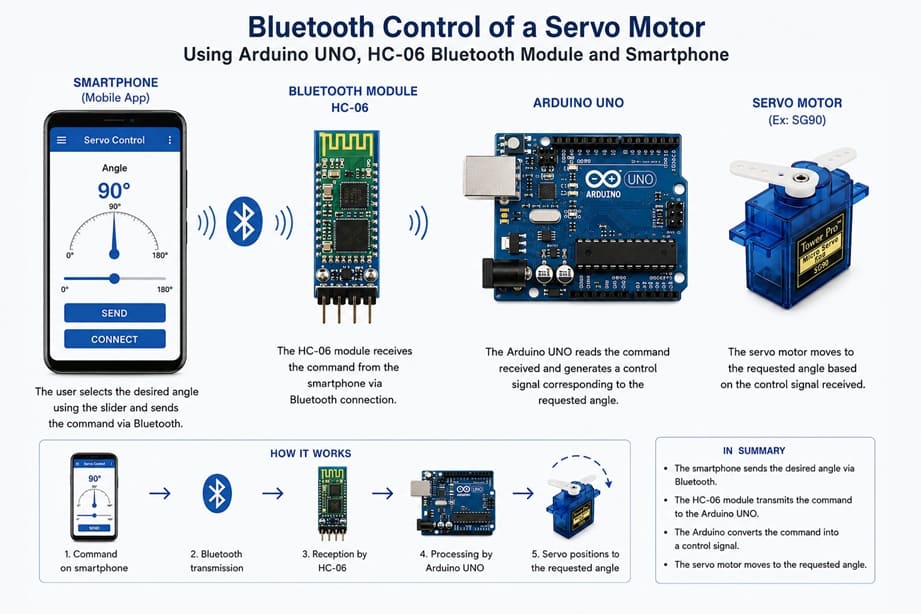
1- The user selects the desired servo motor angle using a mobile application on the smartphone.
2- The smartphone sends the angle command via a Bluetooth connection.
3- The HC-06 Bluetooth module receives the command and transfers it to the Arduino UNO through serial communication.
4- The Arduino UNO reads and processes the received angle.
5- The Arduino generates the appropriate control signal for the servo motor.
6- The servo motor rotates and positions itself at the requested angle.
Required Components
1. Arduino UNO
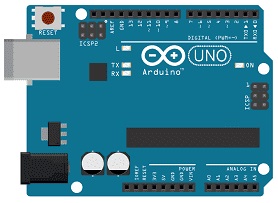
The Arduino UNO is the central controller of the system. It receives the Bluetooth data from the HC-06 module, interprets the received commands, and generates the appropriate Pulse Width Modulation (PWM) control signals required by the servo motor. The Arduino executes the programmed instructions to accurately position the servo shaft.
2. HC-06 Bluetooth Module
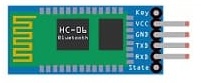
The HC-06 is a Bluetooth serial communication module that establishes a wireless connection between the smartphone and the Arduino UNO. It receives commands sent from the mobile application and transmits them to the Arduino through UART (serial) communication. The HC-06 operates as a slave device and is easy to pair with Android smartphones.
3. Servo Motor
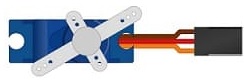
The servo motor is the output actuator of the system. It converts the PWM control signals generated by the Arduino into precise angular movements. Depending on the command received from the smartphone, the servo rotates to the desired position, typically within a range of 0° to 180°, making it suitable for robotic arms, smart locks, automated doors, and other positioning applications.
4. 5 V / 3.3 V Power Supply
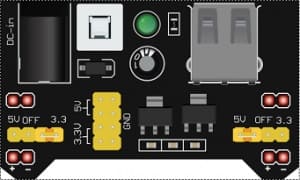
The power supply provides the electrical energy required by the electronic components.
5. Jumper Wires
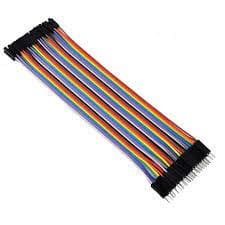
Jumper wires are used to make the electrical connections between the Arduino UNO board, the GPIO expansion board, the HC-06 module and the servo motor.
6. Breadboard
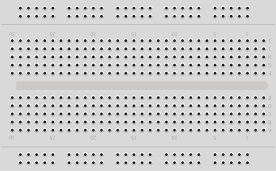
The breadboard is a solderless prototyping board used to build and test electronic circuits quickly and easily.
Circuit Connections of system
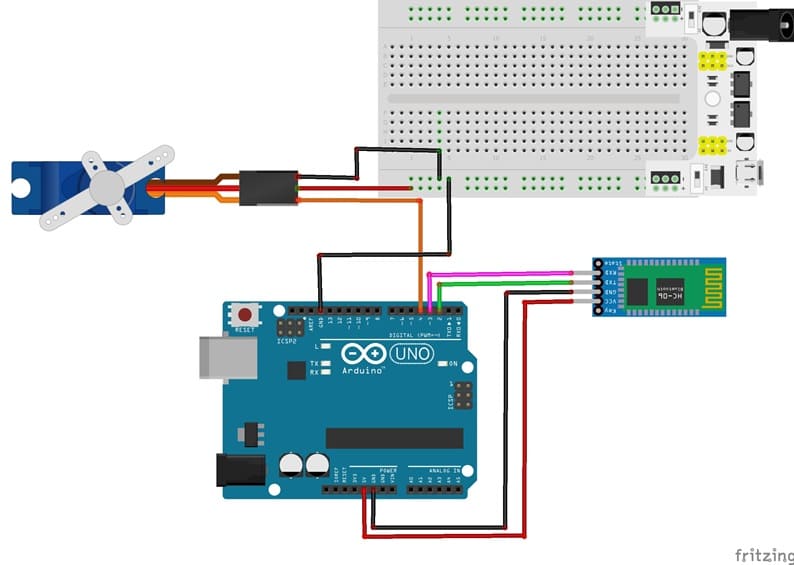
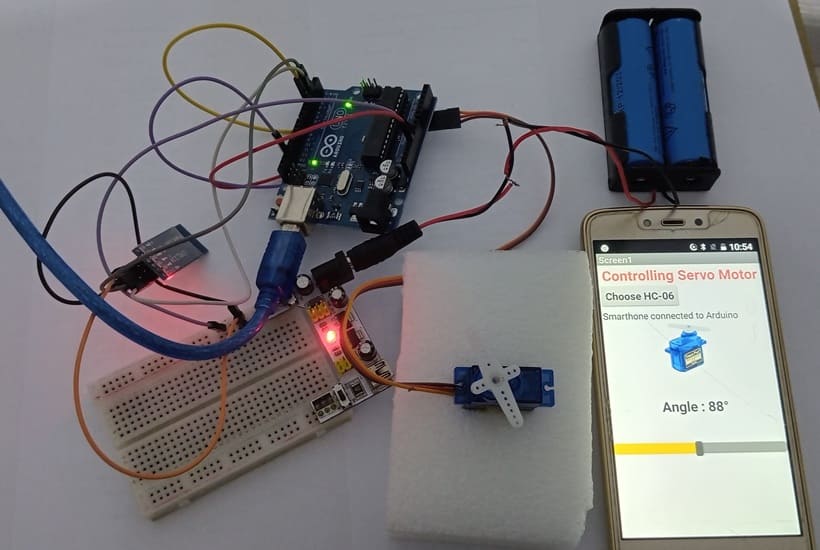
1- Connecting the HC-06 module to the Arduino UNO board
| Module HC-06 | Arduino UNO |
|---|---|
| VCC | 5V from the power supply module |
| GND | GND |
| TXD | D2 |
| RXD | D3 |
2- Connecting the servo motor to the Arduino UNO board
| Servo motor | Arduino UNO |
|---|---|
| Red wire (+) | 5V |
| Brown wire (-) | GND |
| Yellow wire (S) | D4 |
Arduino program
This program enables wireless control of a servo motor using an Arduino UNO, an HC-06 Bluetooth module, and a smartphone application. The smartphone sends the desired servo angle via Bluetooth, and the Arduino receives the command and moves the servo motor accordingly. This type of system is commonly used in robotics, home automation, and remote-control applications.
|
1 2 3 4 5 6 7 8 9 10 11 12 13 14 15 16 17 18 19 20 21 22 23 24 25 26 27 28 29 30 31 32 33 34 35 36 37 38 39 40 41 42 43 44 45 46 47 48 49 50 51 52 53 54 55 56 57 58 59 60 61 62 63 64 65 66 67 68 69 70 71 72 73 74 75 76 77 78 79 80 81 82 83 84 85 86 87 88 89 90 91 92 93 94 95 96 97 98 99 100 101 102 103 104 105 106 107 108 109 110 111 112 113 114 115 116 117 118 119 120 121 122 123 124 125 126 127 128 129 130 131 132 133 134 135 136 137 138 139 140 141 142 143 144 145 146 147 148 149 150 151 152 153 154 155 156 157 158 159 160 161 162 163 164 165 166 167 168 169 170 171 172 173 174 175 176 177 178 179 180 181 182 183 184 185 186 187 188 189 190 191 192 193 194 195 196 197 198 199 200 |
// ========================================================== // Bluetooth Servo Motor Control // Arduino UNO + HC-06 Bluetooth Module // ========================================================== // ========================================================== // Include the required libraries // ========================================================== // Library for creating serial communication // on the digital pins of the Arduino UNO #include <SoftwareSerial.h> // Library for controlling a servo motor #include <Servo.h> // ========================================================== // Bluetooth communication configuration // ========================================================== // Define the serial communication with the HC-06 module // // Arduino UNO -> HC-06 // Pin 2 -> TX of HC-06 (Arduino RX) // Pin 3 -> RX of HC-06 (Arduino TX) // // SoftwareSerial(RX, TX) SoftwareSerial BT(2, 3); // ========================================================== // Create the servo motor object // ========================================================== // Create an object named "myservo" // to control the servo motor Servo myservo; // ========================================================== // Variable declaration // ========================================================== // This variable is used to gradually store // the message received via Bluetooth String message = ""; // ========================================================== // setup() function // ========================================================== // This function runs only once // when the Arduino UNO starts up void setup() { // -------------------------------------------------------- // Initialize serial communication with the computer // -------------------------------------------------------- // Communication speed: 9600 baud // This communication allows information // to be displayed in the Arduino IDE Serial Monitor Serial.begin(9600); // -------------------------------------------------------- // Initialize Bluetooth communication // -------------------------------------------------------- // The HC-06 module communicates with the Arduino // at a speed of 9600 baud BT.begin(9600); // -------------------------------------------------------- // Connect the servo motor // -------------------------------------------------------- // The servo motor control wire // is connected to digital pin D4 myservo.attach(4); // -------------------------------------------------------- // Set the initial servo position // -------------------------------------------------------- // Move the servo motor to the 0° position // when the program starts myservo.write(0); // Display a message in the Serial Monitor // indicating that the system is ready Serial.println("Waiting for a Bluetooth message..."); } // ========================================================== // loop() function // ========================================================== // This function runs continuously void loop() { // -------------------------------------------------------- // Check for incoming Bluetooth data // -------------------------------------------------------- // Check whether data is available // in the Bluetooth module buffer while (BT.available()) { // Read one character received via Bluetooth char c = BT.read(); // -------------------------------------------------------- // Build the received message // -------------------------------------------------------- // The '#' character is used as a delimiter // indicating the end of the message // // Example: // The application sends: 90# // // The received message becomes: "90" if (c == '#') { // ------------------------------------------------------ // Display the received message // ------------------------------------------------------ // Print a label in the Serial Monitor Serial.print("Received message: "); // Display the complete received message Serial.println(message); // ------------------------------------------------------ // Convert the message into an angle // ------------------------------------------------------ // Copy the received message into a second variable String message2 = message; // Convert the text message into an integer // // Example: // "90" becomes 90 // "45" becomes 45 int angle = message2.toInt(); // ------------------------------------------------------ // Control the servo motor // ------------------------------------------------------ // Move the servo motor to the received angle myservo.write(angle); // ------------------------------------------------------ // Clear the message // ------------------------------------------------------ // Erase the message content // to prepare for the next reception message = ""; } else { // ------------------------------------------------------ // Append the character to the message // ------------------------------------------------------ // Add the received character to the end of the message // // Example: // Receive 9 and then 0 // // message = "9" // then // message = "90" message += c; } } } |
The mobile app for controlling the servo motor
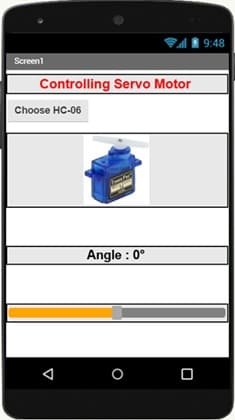
The mobile application was developed using MIT App Inventor to provide a simple and intuitive interface for remotely controlling a servo motor through Bluetooth communication. It enables users to connect an Android smartphone to an HC-06 Bluetooth module and adjust the servo motor's position in real time.
At the top of the application, the title "Controlling Servo Motor" clearly indicates the purpose of the program. Below the title, the "Choose HC-06" button allows the user to search for and connect to the paired HC-06 Bluetooth module. Once the Bluetooth connection is established, the smartphone can communicate wirelessly with the Arduino UNO.
The center of the application displays an image of a servo motor, providing a visual representation of the device being controlled. This makes the interface more user-friendly and helps users easily identify the actuator associated with the project.
Beneath the image, a label displays the current servo position in the format "Angle: 0°". This value is updated as the user changes the servo angle, allowing the user to monitor the selected position before or after sending the command.
At the bottom of the interface, a slider serves as the main control element. By moving the slider, the user selects the desired rotation angle of the servo motor, typically between 0° and 180°. Each time the slider position changes, the application converts the selected value into a text message and transmits it via Bluetooth to the HC-06 module. The message is terminated with a '#' character, which acts as an end-of-message delimiter. For example, if the slider is set to 90°, the application sends the command 90#.
The HC-06 module receives this Bluetooth message and forwards it to the Arduino UNO through serial communication. The Arduino interprets the received angle and generates the appropriate PWM signal to move the servo motor to the requested position. This communication process occurs almost instantly, allowing smooth and responsive real-time control.
Overall, the MIT App Inventor application provides an easy-to-use graphical interface that eliminates the need for physical buttons or wired connections. By combining Bluetooth communication with a slider-based control system, it offers an efficient and convenient solution for remotely positioning a servo motor in educational, robotic, and home automation applications.
0 comment
Leave a comment
Passion for robotics

Recent tutorials
Robotics workshop
Polpular tutorials
Making robots

Most commented tutorials

Robotic arm

Categories
Smart Home