ESP8266 NodeMCU project : DIY coin dispensing machine

Tutorial plan
1- Objective of the project
2- Required Components
3- Circuit Connections of system
4- Micropython program of ESP8266 NodeMCU
Objective of the project
The objective of a DIY coin dispensing machine based on an ESP8266 NodeMCU is to automate the controlled release of coins in a precise and user-friendly manner. The system is designed to allow a user to select a predefined amount or type of coin using push buttons, while providing real-time feedback through an I2C LCD display. This type of system is typically used in small vending prototypes, financial training setups, or embedded systems projects to demonstrate automation, electromechanical control, and human-machine interaction. The use of the ESP8266 also enables future extensibility such as wireless control, logging, or integration with IoT platforms.
Functioning
The system operates by continuously monitoring the state of two push buttons connected to the GPIO pins of the ESP8266 NodeMCU. Each button is assigned a specific function, such as selecting the coin type or initiating the dispensing process. When a button is pressed, the microcontroller processes the input and executes the corresponding routine. The LCD I2C screen, connected via the I2C protocol (typically using SDA and SCL lines), displays instructions, selected options, and system status messages.
Once a dispensing command is triggered, the ESP8266 sends a PWM signal to the servo motor. The servo is mechanically linked to a coin release mechanism (such as a rotating gate or lever). Upon receiving the control signal, the servo rotates to a specific angle to release exactly one coin (or a fixed quantity), then returns to its original position to block further coins. Timing delays and angle calibration are critical here to ensure accurate dispensing and to avoid jamming or multiple coin releases.
The system may also implement software debouncing for the push buttons to prevent false triggering, and state management logic to ensure that only valid sequences of actions are accepted. Overall, the integration of input (buttons), processing (ESP8266), output (servo motor), and user interface (LCD) creates a compact embedded system capable of reliable and repeatable coin dispensing.
Required Components
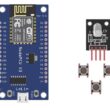
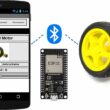
1. ESP8266 NodeMCU
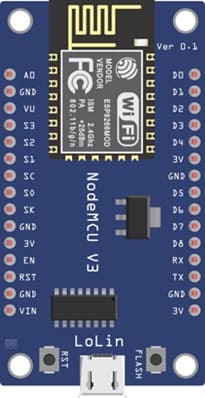
The ESP8266 NodeMCU is the central processing unit of the system. It handles:
- reading digital inputs from push buttons
- generating PWM signals to control the servo motor
- communicating with the LCD via the I2C protocol
2. Push Buttons
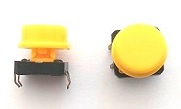
Two momentary push buttons are used for user interaction:
Button 1: Typically assigned to select coin type or increment value
Button 2: Used to confirm selection or trigger dispensing
3. SG90 Servo Motor
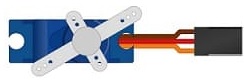
The servo motor is responsible for the mechanical dispensing of coins. It rotates to a calibrated angle to release one coin and returns to its initial position to block further coins.
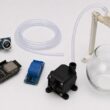
4. Mechanical coin dispensing mechanism
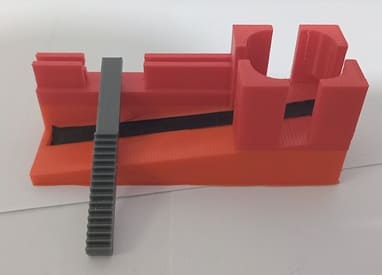
The mechanical coin dispensing mechanism is responsible for storing and releasing the coins one by one. It is usually composed of a coin holder, a guiding channel, and a moving part that pushes or releases the coin. The servo motor drives this mechanism to dispense the coins accurately.
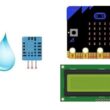
5. LCD Display with I2C Module

The LCD I2C display is used to allow the system to show information to the user. It can display the selected amount.
6. Breadboard

A breadboard is used to assemble the circuit without soldering. It makes it easy to connect and modify the components during testing and development.
7. Jumper Wires

Jumper wires are used to connect the ESP8266, servo motor, and LCD display together. They ensure proper electrical connections between all components.
8. Power Supply Module
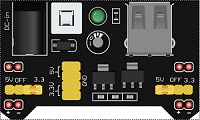
The 5V/3.3V power supply module provides the necessary electrical power to the electronic components used in the coin dispensing system. It converts the input voltage (for example from a 9V battery, USB supply, or external adapter) into stable 5V and 3.3V outputs required by different components.
9. 9V Battery
The 9V battery serves as the main energy source for the electronic system. It provides the electrical power needed to operate the components of the coin dispensing machine.
Circuit Connections of system
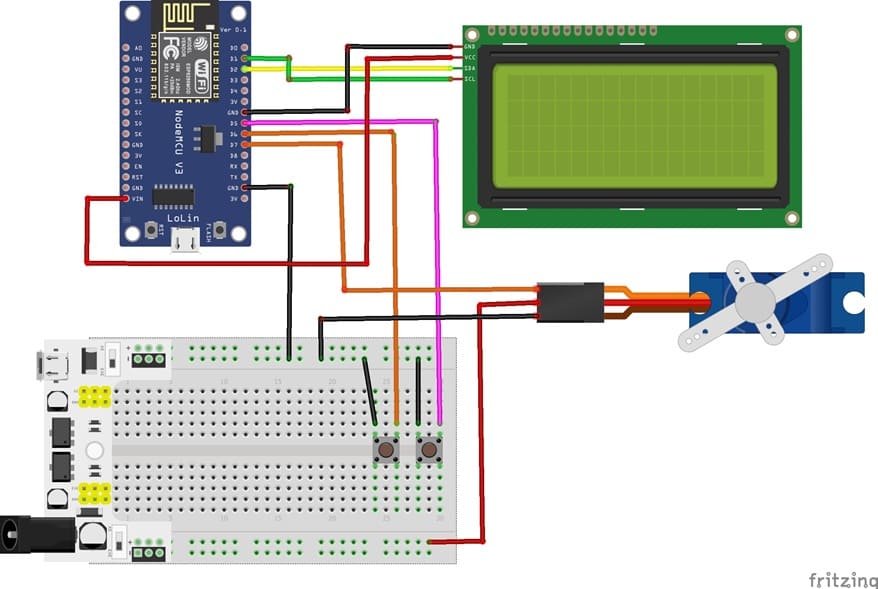
1- Connection of servo motor to ESP8266
| Serv motor | ESP8266 |
|---|---|
| Red wire | 5V of supply power |
| Brown wire | GND |
| Yellow wire | D7 |
2- Connection of LCD I2C display to ESP8266
| LCD I2C display | ESP8266 |
|---|---|
| VCC | 5V |
| GND | GND |
| SDA | D2 |
| SCL | D1 |
3- Connecting button 1 to the ESP8266
| Button 1 | ESP8266 |
|---|---|
| Leg | D5 |
| Another leg | GND |
4- Connecting button 1 to the ESP8266
| Button 2 | ESP8266 |
|---|---|
| Leg | D6 |
| Another leg | GND |
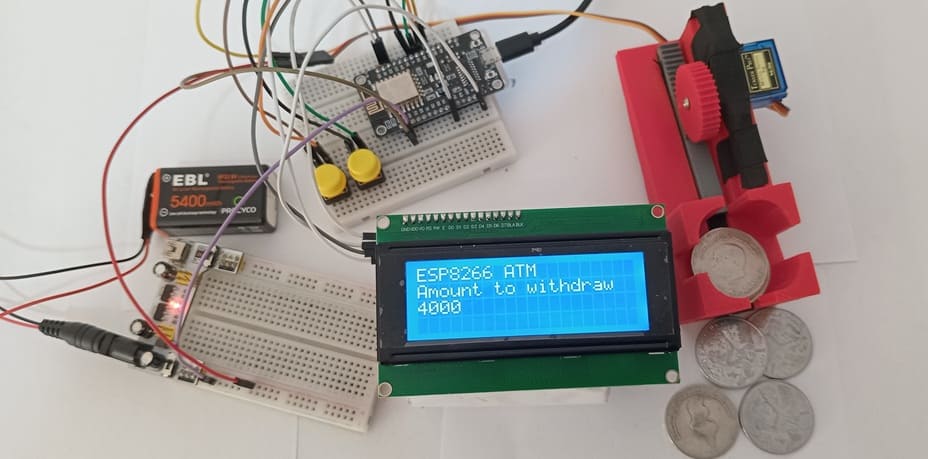
Micropython program of ESP826 NodeMCU
The program serves as the control software for a DIY coin dispensing machine using an ESP8266 NodeMCU, an LCD I2C screen, two push buttons, a servo motor, and a mechanical coin dispensing mechanism. Its main role is to coordinate the interaction between the user, the electronic components, and the mechanical system to automatically dispense coins based on user input.
You need to install this libraries :
i2c_lcd et lcd_api for I2C LCD screen
Servo → to control the servomotor
|
1 2 3 4 5 6 7 8 9 10 11 12 13 14 15 16 17 18 19 20 21 22 23 24 25 26 27 28 29 30 31 32 33 34 35 36 37 38 39 40 41 42 43 44 45 46 47 48 49 50 51 52 53 54 55 56 57 58 59 60 61 62 63 64 65 66 67 68 69 70 71 72 73 74 75 |
from time import sleep from machine import Pin, I2C, SoftI2C from servo import Servo # Import the library used to control the I2C LCD display from i2c_lcd import I2cLcd I2C_ADDR = 0x27 I2C_ADDR = 0x27 totalRows = 4 totalColumns = 20 # === Initialize the I2C LCD === i2c = SoftI2C(scl=Pin(5), sda=Pin(4), freq=10000) # Initialize I2C communication for ESP8266 lcd = I2cLcd(i2c, I2C_ADDR, totalRows, totalColumns) # Clear the LCD screen lcd.clear() # Display initial messages lcd.move_to(0, 0) lcd.putstr("ESP8266 ATM") lcd.move_to(0, 1) lcd.putstr("Amount to withdraw") lcd.move_to(0, 2) lcd.putstr("0") amount = 0 # Configure push buttons with internal pull-up resistors button_1 = Pin(14, Pin.IN, Pin.PULL_UP) button_2 = Pin(12, Pin.IN, Pin.PULL_UP) # Initialize the servo motor (GPIO13) servo_motor = Servo(pin=13) servo_motor.move(0) # Initial position at 0° # Initial servo test (back-and-forth movement) for i in range(2): servo_motor.move(150) # Move to open position sleep(0.5) servo_motor.move(0) # Return to initial position sleep(0.5) while True: # If button 1 is pressed → increase the amount if button_1.value() == 0: amount = amount + 1000 lcd.move_to(0, 2) lcd.putstr(str(amount)) # If button 2 is pressed → confirm and dispense if button_2.value() == 0: # Dispense coins according to the amount for i in range(amount // 1000): servo_motor.move(150) # Release one coin sleep(0.5) servo_motor.move(0) # Return to blocking position sleep(0.5) # Reset amount after dispensing amount = 0 lcd.move_to(0, 2) lcd.putstr(str(amount)) sleep(0.3) |
0 comment
Leave a comment
Passion for robotics

Recent tutorials

Robotics workshop

Polpular tutorials


Making robots

Most commented tutorials


Robotic arm

Categories
Smart Home